How to Clean and Restore Vintage Pez Dispensers Safely

What's Actually Involved in Cleaning Old Pez Dispensers?
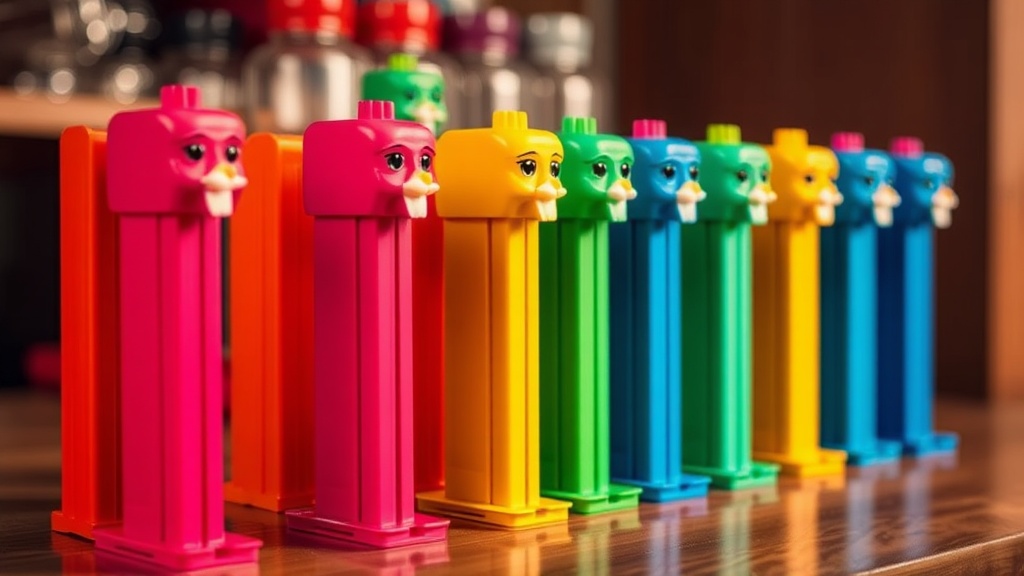
This post covers the step-by-step process for safely cleaning and restoring vintage Pez dispensers without damaging their value. Whether a dispenser has been sitting in a dusty attic for decades or acquired at a garage sale covered in grime, knowing how to clean it properly makes the difference between preserving a collectible and accidentally destroying it. Cleaning vintage Pez dispensers isn't complicated, but doing it wrong can strip paint, cloud plastic, or leave behind residue that attracts more dirt. The methods outlined here work for dispensers from the 1950s through the 1990s—the era most collectors focus on.
Before diving into any restoration project, assess what the dispenser actually needs. Some collectors prefer "patina"—that slightly yellowed, lived-in look that signals authenticity. Others want their pieces pristine. There's no right answer here. The key is matching the cleaning approach to the goal while respecting the item's history.
What Supplies Do You Need for Safe Pez Cleaning?
You'll need mild dish soap (Dawn or Joy work perfectly), distilled water, soft microfiber cloths, cotton swabs, a soft-bristled toothbrush, baking soda, white vinegar, and petroleum jelly. Avoid anything abrasive—no steel wool, no harsh chemical cleaners, no magic erasers. Those tools strip paint and scratch plastic faster than you'd believe.
For deeper restoration, consider these additions to the kit:
- Retrobright gel or 12% hydrogen peroxide cream — for yellowed plastic
- Museum wax or Renaissance wax — for protecting metal springs
- Wooden toothpicks — for scraping dried candy residue from crevices
- Compressed air — for blowing dust out of hollow stems
- Magnifying glass or jeweler's loupe — for spotting hairline cracks before they worsen
Most of these items cost under $10 and last through dozens of restorations. Don't overthink the supplies. Simple, gentle tools beat aggressive chemicals every time when dealing with vintage plastics.
How Do You Clean the Stem Without Ruining It?
Remove the head from the stem first—this is non-negotiable. The stem holds most of the dirt, and trying to clean it while attached risks getting water into the head mechanism. Most vintage Pez stems have a small tab near the top; press it gently while pulling the head upward. Some early models require twisting while pulling. If it doesn't budge, don't force it—soak the connection point in warm soapy water for ten minutes to loosen dried candy residue.
Once separated, rinse the stem under lukewarm water. (Hot water warps vintage plastic—avoid it entirely.) Use the soft toothbrush with a drop of dish soap to scrub the exterior. Pay special attention to the feet—the little nubs at the bottom where the dispenser stands. These collect sticky residue from decades of sitting on shelves and in display cases.
The interior of the stem needs attention too. Old candy dust hardens into cement-like clumps. Use a cotton swab dampened with distilled water to reach inside. For stubborn buildup, wrap a dampened corner of cloth around a wooden chopstick and twist it through the hollow tube. The cloth provides gentle abrasion without scratching.
Here's the thing—some stems have "Patent Numbers" embossed on them. These markings add value to collectors. When cleaning around these areas, use extra care. Aggressive scrubbing can wear down the raised numbers over time.
After cleaning, let stems air dry completely. At least four hours. Overnight is better. Trapped moisture leads to mold and that funky smell no collector wants in their display case.
What's the Best Way to Clean Pez Heads Without Damaging Paint?
Pez heads require the gentlest touch of any component. The painted details—eyes, mouths, accessories like hats or glasses—are delicate. Even water can lift loose paint if it's already flaking. Start with a dry microfiber cloth. Wipe away surface dust. Often, that's all a head needs.
For grimier heads, dampen (don't soak) a cotton swab with distilled water. Test an inconspicuous area first—maybe the back of the head near the hairline. If paint transfers to the swab, stop immediately. The paint is too unstable for wet cleaning. Stick to dry methods: soft brushes, air dusters, and patience.
When paint is stable, use the damp swab to lift dirt gently. Work in small circles. Switch to fresh swabs frequently—dragging a dirty swab across paint creates scratches you can't fix. For textured areas (beards, fur, hair), use the soft toothbrush with almost no pressure. Let the bristles do the work.
The catch? Some vintage Pez heads have "factory paint flaws" that look like dirt but aren't. A smudge on a vintage Mickey Mouse head might actually be original paint variation. Research before scrubbing aggressively. Sites like Pez Collector have reference photos showing what's normal for specific releases.
After cleaning heads, let them dry separately from stems. Don't reassemble until everything is completely dry—moisture trapped between head and stem creates a humid microenvironment that degrades plastic over years.
Dealing with Sticker Residue and Tape Marks
Garage sale finds often have price stickers or tape residue. Don't pick at these dry. Soak a cotton ball in warm water mixed with a few drops of dish soap. Hold it against the sticker for two minutes to saturate the adhesive. Most stickers lift off cleanly after this treatment.
For stubborn residue, rubbing alcohol on a cotton swab works—but test it first. Alcohol can dull some painted surfaces. Work quickly, don't soak the area, and wipe away residue immediately. Follow with a clean damp cloth to remove any alcohol traces.
Worth noting: some collectors leave original price stickers intact. A 1970s dispenser with a 49-cent Kmart sticker still attached tells a story. That's a personal choice. If the sticker damages the underlying surface when removed, the damage is permanent. Sometimes leaving history alone is the smarter play.
How Do You Fix Yellowed or Discolored Plastic?
Yellowing happens to vintage plastic. It's oxidation—completely natural, but visually unappealing. The Retrobright method reverses this process using ultraviolet light and hydrogen peroxide. It works remarkably well on Pez stems and some head types.
Here's the process: coat the yellowed plastic with 12% hydrogen peroxide cream (beauty supply stores carry this as "40 volume developer"). Wrap the coated piece in clear plastic wrap to prevent drying. Place it outside in direct sunlight or under a UV lamp. Rotate every 30 minutes for even exposure. Depending on the severity of yellowing, this takes 4–12 hours.
Check progress regularly. Over-bleaching makes plastic chalky and brittle. Once the desired color is achieved, wash thoroughly with mild soap and water. The results can be dramatic—a stem that looked nicotine-stained returns to bright white or its original color.
That said, Retrobright isn't permanent. The plastic will yellow again over years, though typically slower than the first time. Some collectors repeat the process every decade. Others accept the vintage look. Neither approach is wrong.
What About Painted Heads?
Don't Retrobright painted heads. The peroxide fades paint unpredictably. A bright red Santa hat might turn pink. Blue eyes might wash out to gray. The risk isn't worth the reward on rare pieces.
For yellowed painted heads, gentle surface cleaning is the only safe option. Some discoloration is part of the aging process. Embrace it. A slightly creamy Mickey Mouse head shows authenticity—a stark white one might signal a reproduction or harsh restoration.
Cleaning and Protecting Metal Springs
The spring mechanism inside Pez dispensers rarely needs cleaning, but when it does, rust is usually the culprit. Surface rust on visible spring coils can be gently removed with a cloth barely dampened with white vinegar. Follow immediately with a dry cloth—moisture is the enemy of vintage metal.
After cleaning, apply a microscopic amount of petroleum jelly to the spring with a cotton swab. This prevents future rust without gumming up the mechanism. Work the head up and down a few times to distribute the lubricant. Wipe away any excess—too much attracts dust.
If a spring is severely rusted or broken, replacement might be necessary. Original vintage springs are available from eBay sellers specializing in Pez parts. Modern reproduction springs work too, though purists prefer vintage components. Either way, a functioning spring transforms a display piece into a usable dispenser again.
Reassembly and Storage After Cleaning
Wait until every component is bone dry before reassembling. Snap the head back onto the stem firmly—you should hear a clear click. Test the mechanism. The head should stay upright when opened and snap back when the candy pusher is pressed. If it's loose, the locking tab might be worn. A tiny piece of clear tape around the stem's top can create a tighter fit without permanent modification.
Store cleaned dispensers in a cool, dry place away from direct sunlight. UV exposure causes fading and re-yellowing. Dust display cases regularly—accumulated dust gets sticky over time and becomes harder to remove. Some collectors use silica gel packets in storage containers to control humidity, especially in damp climates like Asheville or the Pacific Northwest.
When Should You Leave a Pez Dispenser Alone?
Not every dirty dispenser needs cleaning. Extreme rarity changes the equation. A one-of-a-kind prototype or factory error piece might lose value if cleaned, even gently. The "original condition" matters more than cleanliness for investment-grade items.
Also, consider the dispenser age. Pre-1970s "regulars" (the no-feet European style) are fragile. The plastic becomes brittle with age. Aggressive cleaning can crack stems or chip heads that have survived fifty years just fine. Sometimes a gentle wipe with a dry cloth is the maximum safe intervention.
| Condition | Recommended Action | Risk Level |
|---|---|---|
| Light surface dust | Dry microfiber cloth only | Minimal |
| Sticky residue, minor grime | Mild soap and water wash | Low |
| Yellowed plastic stem | Retrobright treatment | Moderate |
| Flaking or unstable paint | No liquid—dry clean only | High if wet |
| Rare prototype/error piece | Professional consultation | Very high |
| Pre-1970 brittle plastic | Minimal intervention | High |
Collecting Pez dispensers connects enthusiasts to decades of pop culture history. Each piece carries stories—candy stores long closed, childhood allowances spent, characters that defined eras. Cleaning them respectfully honors that history while preparing these small artifacts for the next generation of collectors. The best restorations are the ones nobody notices. The dispenser simply looks like itself at its best—clean, functional, and ready to display.
Steps
- 1
Gather Your Cleaning Supplies and Assess the Condition
- 2
Clean the Stem and Internal Mechanism Gently
- 3
Restore the Head and Reassemble Carefully